Posts

Showing posts with the label another card

another card

Image
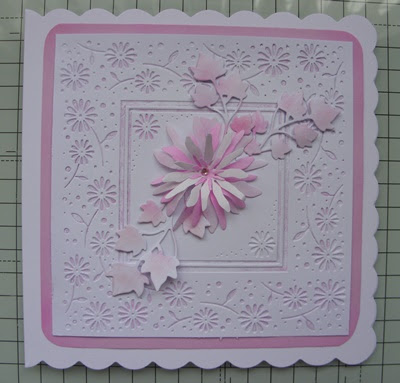
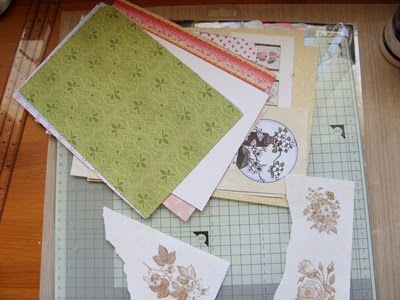
Good morning everyone I hope you had a good weekend. I have another of my new flower die cards to show you, made at the weekend. The embossed layer was using an embossing folder included in a magazine. I inked it so that the colour went into the de-bossed side - so that it was very delicate. The daisy flower I made from ordinary weight copy paper & coloured them with pink ink. The ivy leaves I made from a lightweight white card & gave them just a hint of pink. It didn't look right with white leaves, or with green ones. I am really pleased with the finish.   I have not put a sentiment until I know who will be receiving it. Have a good day. 'Bye for now.

another card

Image
Hello ladies I am here today with another of my recent cards & this time it has been stamped. The stamps used on this card were part of a freebie set on a magazine some time ago & I hadn't used them for a while. I do love the Macintosh style - it can look clean & simple like this or really full of colour.  The card is a cream scalloped card & the stamping I did in black archival ink & embossed it with clear EP.  I then added a little colour with my pearlescent watercolour paints.  I used a bronze colour. Sometime last week (I think) Lesley from Chocolate Baroque was on Hochanda & showed her Macintosh inspired stamp set.  The samples were both clean & simple & also vibrant colours.  I must try this set with some vibrant colours they looked really good. Still more to show you. 'Bye for now.

Another card

Image
Hello everyone. Today I can show you a card I made for a young lady who reached the ripe old age of 40 this year; I used toppers & papers from that Hunkdory kit I won rather a log time ago. The "40" I put inside the card trying to be a little more discreet than usual.  The it is going down slowly - it certainly has gone a long way. Looking through my card photos I find there are several I have made recently that I have not shown you - so they will appear slowly over the next week or so. That's me for today - bye for now.

another recent card

Image
Good afternoon everyone. This afternoon I am popping in with another of my cards to show you. This one is for our son-in-law who is in the USA.  His birthday isn't until November but I have to get it in the post early as sometimes it takes quite a while.  We sometimes moan about our postal service but theirs isn't too great.  The new home card & little present I sent recently took a couple of weeks to arrive. Here is his birthday card; Sadly because of the mirri card - you can see the reflection of me taking the photo.  I managed to find some royalty free background papers on the Internet to carry the cog pattern to the inside of the card. I liked the way the pattern faded at the bottom - so as I had made a tent fold card this meant when the paper was folded in half the paler end would be where the sentiment was going.  It looked really good.  I didn't photograph it though, I forgot. So of the November birthdays there are - t...

another recent card

Image
Good evening ladies - can you believe that another weekend is here again already.  I know they are nice to have but they are coming around a bit fast aren't they - the year is rushing by. Today I have a photo of the other card I made with the Renee Mackintosh stamps; Another black card but this time with a green background & using 2 of the corner images & one of the smaller toppers, finished off with some pearls. I haven't made anymore of those cards just yet as I have been preparing the bits & pieces for a special event card that is coming up shortly & I cannot show you that until after the event. Yesterday I had one of my crochet workshops which was a very pleasant way to spend a couple of hours.  But in the morning before going to the workshop I created myself a little "prompt" book for when I do demonstrations, workshops & talks.  I spotted the spiral bound book in The Range when I was there with Caroline.  It is basically a s...

Another card

Image
Good evening ladies The card I have to show you tonight is my card to Bob for Valentine's Day; On a separate piece of card I embossed the heart panel - they are along the bottom part of the card. I then die cut a heart, a flourish & the words Valentine & Husband.  The heart was then popped into an embossing folder to add texture.  A red ribbon about one-third of the way up &3 red gems were added & layered onto the scallop edged based card. Amongst the time spent on creating cards - so far this week I have also spent about 2.5 hours each day continuing with the wedding sampler cross stitch I am doing for Elayne & Gareth.  I hadn't touched it for a little while whilst I had this awful cough (especially when it was really bad) as I didn't want to cough all over the sampler.  It has been quite a few years since I have done any cross stitch - so once again I am reminded how little seems to get done at a time.  After 2.5 hours you ...

Another card

Image
Hi everyone - this afternoon I have a photo of another card I have made using up one of the basic sample folded corner cards; This one is a 5x7 card rather than the square card.  After a little bit of thinking I remembered I had some offcuts of embossed card in my ""scrap" box - so I got them out & had a play with the layout. I didn't like the seams between them so covered them with lilac peel-off borders.  Then when I had decided what I would make as a topper I bordered the corner fold as well.  The butterfly stamp was one of a set that was on a magazine before Christmas. I stamped in Versamark Ink & heat embossed with gold EP, then coloured the butterfly with my pearlescent watercolour paints.  I decided just before putting it all together that it was lacking something - so I stamped & coloured another butterfly & cut it out. I then used my new Wink of Stella clear crystal pen to add a sparkle & shaped the wings before placing it over...

A card from the sort out

Image
Hi everyone - still slowly sorting through everything.  I got some of the boxes labelled this morning so I know what is in them - even though most of them are transparent & I can see the contents. I took time out from the sorting to make a card from "stuff" or perhaps "stash" is  better word, that was in a box I was looking through. Here is what I gathered together & to this I added peel-off borders & a peel-off "Happy Birthday" along with some gems for bling. Here is the card; I used a cream scalloped square card, a piece of the green background paper & one of the sepia images you can see at the bottom of the first photo.  I coloured the image with pearlescent water colour paints - even painting over the sepia block leaves.  I layered the green panel onto the card, went around the edge with the border peel-offs then brushed some pale pink Distress Ink on the cut out flower image which I cut out with fancy scissors.  Thi...

anothher card - sorry no stamps

Image
Hi everyone - I hope you have had a good day O dear - I am still having tis problem with the letter h on my laptop.  Only two errors in tis sentence.  Oops! now it is three.  Ha ha - but it is a pain really.  Not sure what I am going to do about it. Anyway - I tought  ( I saw a puddy tat - hmm! - this is really weird) Let's try & get a bit serious now.  Tonight I am going to show you the card I made for Gareth & Elayne on the occasion of their engagement. I used a white 5x5 scalloped edge card with a silver layer on top of which I placed a piece of white card which I had embossed with one of my embossing folders.  It just happened to have hearts on it. I then die cut 2 hearts - one with an embossed pattern to one side & one with lacy cutouts.  The lacy one I cut in white & layered onto a silver heart.  The embossed one I cut & embossed on silver then using a peel off alphabet I laid the name Gareth & ...

A card I made today ....

Image
I saw Rosemary Merry on C&C this morning make a little card or scrapbook in this style.  I scribbled some notes whilst she was making it but that came out a bit too small for me - so I adjusted the sizes & that was much better. There are 5 photos in all because it gradually unfolds. This is the inside of the whole card.  This is the reverse of the card - the central panel has nothing on it as it is where I would put my hand written message This shows the card with the bottom flap folded up & the top flap folded down Now this one has the right hand flap folded over Here the card is closed completely. I coloured the card with Crushed Olive distress Ink & a blending brush leaving a small area in the centre not coloured.  The greeting in the centre had some Crushed Olive & Wild Honey brushed on it.  The images were stamped with black archival ink, then coloured with watercolour pencils applied with my faithful wa...

Another card!

Image
Good morning everyone Yes, another card - but this one was made at my Happy Stampers club night last night.  Very much made on the hoof.  It was our birthday meeting last night - we are 17!!!!  I cannot believe that it is 17 years - where has the time gone! Our project was to make a birthday card that featured cake.  Well! not my sort of stamp - but I had a set that was a freebie on a magazine so I took that & some ink & watercolour pencils.  Oh dear - some of the stamps were rather frustrating.  There was one that I think was meant to represent a tablecloth - I couldn't get ink in the middle & as you know I use a stamping mat to assist with the pressure. Anyway I was rescued by Caroline who had one of her texture mats with her which was lacy - so you will see that I used that on a piece of torn paper.  The set had a row of bunting which I thought was cute & was going to use but it wouldn't stick to the block.  That can be re...

another card

Image
Good evening everyone Well despite having to wait around for the gas man today & also having a visit from my brother & nephew I did manage to get a card done. I have lost count - I think this is number 7 - which on my reckoning makes me 3 cards adrift with my attempt to make one a day starting from a week ago Tuesday. So a bit of catching up to do. A complete change of colour for me.  This is another Dimension Stamps image & is the first time I have used it.  I decided I would have some background paper for a change too & looking through a pad I had, I spotted (sorry - no pun intended) this spotty orange paper.  But it is not orange - I don't know what you would call it.  Looking for the colour ink pads to use I found I had 2 in that sort of shade, in fact the darker one is almost identical & it is called Topaz.  Now I made a serious stampers error.  Having painted the image with my trusty water brush & the ink pads I cut ...

today's card

Image
Good evening ladies This morning I had a shredding session again, first for a while - it has a strange satisfaction factor.  But isn't it strange how the shredded paper takes up more room in the bags than it did when it was sheets of paper. I also had a very nice young man come round & help me sort the garden - so now at the front it looks like someone who cares lives here. In the afternoon I had a card making session - session makes it sound like I made loads but I actually made just one.  In my defence I also have two images ready stamped for another card. I chose to create another clean & simple monotone card.  The corner images were stamped with an aubergine pigment ink & embossed with clear EP.  The main image was stamped in archival black ink & also embossed with clear EP.  Then I coloured it using the same pigment ink & my water brush & layered onto black card.  Then place on a deckle edged white folded card. ...

another card -day 2

Image
Good afternoon ladies Well, day 2 & I have made another card.  It doesn't sound very good really - but if I do one card a day I will have more made than if I do it at ad hoc times.  Of course some cards will have to be done as required but it is nice to have a stock of cards already made. Here is today's card - Both the stamps were part of a magazine freebie but I don't have the information attached to it anymore. I think I might start photographing them with their information card & keep that on file, as I am often asked which set stamps are from. I stamped the corner floral image the sentiment & the little butterfly in black archival ink which I then quickly embossed with clear EP.  The colouring I did with pigment inks & a waterbrush - except for the little bits of yellow, as I do not have a yellow ink pad.  For that I used my Pan Pastels, again using the waterbrush to apply the colour.  The leaves were coloured with an unusual...