Posts

Showing posts from February, 2013

A question!

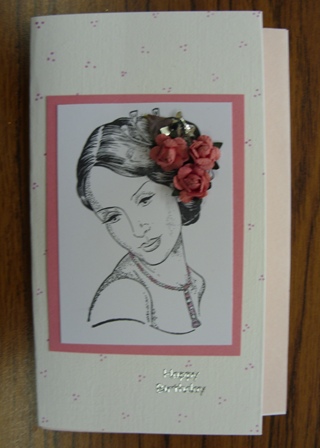
But before I ask the question I thought I would tell you that the latest posting that I did yesterday was our 1000th post on this blog.  It soon mounts up doesn't it. Now - the question.  A couple of weeks ago I had an email from a club member thanking me for her birthday card but letting me know (because she thought I would want to know) that the insert had become unstuck from inside the card.  So the question is - have any of you had this problem with a card from me.  I really would like you tell me if you have - just email me - or place a comment in this post.  If it is happening quite a bit I will need to change the way I do it.  Currently I use double-sided sticky tape. The reason I am asking you now rather than a couple of weeks ago - I had intended to ask when writing a post, but kept forgetting to include it.  Now the problem has increased. Yesterday I showed you a photo of the lovely pillow boxes I have made for my wedding reception.  Last night I noticed one of them

2012 Project - Mold II - Carol

Image
Well, here I am back again with the second set of photos for the 2012 Project.  This time it is Carol & her chosen stamp is a beautiful lady. Here are her cards; Isn't she beautiful?  This design is so lovely & really sets the image off. Again clean & simple design & a great use of a doily edging to frame her. A little more drama with this one framing it in holographic silver & backed with the embossed card. Just beautiful......... ...... and elegance again.  This time with a gold frame on an easel style card. I so often use the term clean & simple when describing cards & I hope everyone understands what I mean by that.  It in no way implies the card is simple but more that it is clean & uncluttered.  A bit later I will be back with the photos from the meeting - unfortunately once again my camera batteries ran out & I took the remainder of the photos on my mobile phone.  So I need to email them to myself in

2012 Project - Mold II - Elizabeth

Image
 We had a very good meeting last night & there were lots of photos for me to take.  In fact, too many to take during the evening. Four ladies brought in their 2012 project cards.  Two were in folders, so I have brought those home to photograph over the next couple of days.  The other two ladies had made just a few cards so I took the photos of those. The challenge for 2012 at Mold II was to use one stamp in as many ways as possible & here are the ones brought in by Elizabeth.  The stamp she chose to work with was a medallion stamp; A really elegant monochrome card with the medallion hanging in the octagonal aperture. A very elegant card I love the way the wording "tails" giver the impression that the medallion is a bouquet. Well that is what my eye sees.  What do you think? I have to hold my hand up here & say I absolutely love this card.  It is even better in the flesh as the inner black background is glitter card.  The medallion has be

Happy Birthday .............................

Image
....................... Yvonne, a Mold club member Have a lovely day Yvonne Happy Birthday!

wedding diary - page 6

Image
Hi everyone Just enjoying a cup of tea after taking my sugar roses to the next stage.  It's a job I cannot do sitting down - so after a while my back starts to ache.  Hence the sit down & cup of tea. Today I added another layer to the cones that make the centre of the roses.  I have 2 photos for you - the first one is all the roses stuck in the oasis & the second one is a close up of one of them. No matter how careful I am at this stage I can never get 2 the same - anywhere near the same. But then nature doesn't make them the same so why do I worry about it. Here is a close up of one of them.  They will have varying number of layers added to them.  About 4 will have one more layer, then the rest will have 2 or 3 more layers.  At the moment they are a very pale ivory & will be dusted to take them a shade darker. My next task is to make the leaves - they are the part of flowers I always have the most trouble with as they need to be thin in order

just chatting

Image
Good evening everyone - I hope you have had a nice weekend. Today has been mainly used for sorting the programme for the clubs for the next 3 months, in fact I managed to get through to August.  The months that are definite are April to June, then July & August could get changed depending on what interesting things arise. I have stood back from wedding items today - but will have to push on during the rest of the week.  Must keep up. Tomorrow evening is the February meeting for Mold II, so I have put my box already & hopefully I should not arrive there minus things. Then Wednesday I will have photos for you to look at. I did take a little time out this morning to make a card for a challenge on the CD Sunday Challenge blog & thought I might show it to you here.  The theme was hugs & wishes. This little cutie is called Violet & the sentiment is "If all else fails hug your Teddy" - so I even did a little (very little) stamping.  I did some 3-d

Mold photos - part 2

Image
So here I am back again this time with the photos from the evening's project which was "A Dabble with Encaustic Wax" I hope all the ladies agree with me but I think it was one of the best & fun evenings we have had.  The reason possibly being due to the fact that there were 2 or 3 "stations" at which everyone could have a play, so ladies were walking around the room & interacting. Including myself 4 ladies present had worked with encaustic wax before & therefore there was more than one demonstrator.  I have to say ladies, considering this was the first time for many - the samples should really impress you - they are brilliant. I hope that I am showing the samples the way round they were intended to be - I have used any grass style strokes to ascertain up from down.  Here are the photos - more comments at the end - this time I am going to let the photos speak for themselves.

Mold photos - part 1

Image
Hello! here I am with the first set of photos from the Mold meeting on Thursday evening & this set is of the Show & Tell where the theme was Daffodils. You can just see the flowers gently swaying in the breeze can't you.  How lucky they are too with that bright yellow disk above them - we had one of those last Tuesday didn't we! I love the combination of the embossed background & the foreground leaf sprays. That's a great sentiment too. A really nice layout using just one stamp - just shows you don't have to use lots of stamps I love the almost distressed look of this one - & I happen to know the owner almost didn't put it into the Show & Tell.   Another lovely host of golden daffodils with the appropriate sentiment A really lovely box card.  I did take a photo of it standing up so you could see the box better - but it was too fuzzy to show. Isn't that background great & the random inking re

just chatting - again

Image
Hi everyone - sorry tonight is once again a just chatting post. I have spent most of the day with Nadine continuing to sort my floral decorations - with great success I might add.   I am getting quite excited because the ideas I have in my head are becoming reality & it is absolutely great. Over the weekend I will be taking my sugar flowers to another dimension - that is - adding further layers. Bob made us take a break today at about 1:00 pm & took us out for lunch at the Hawarden Farm Shop.  Gosh they slice the bread thick for their sandwiches.  But it was good to take a break. So I am afraid I have not got around to loading the photos from the Mold meeting last night - I do hope you will forgive me.  I will definitely do that tomorrow & will get both the Show & Tell & the Project photos loaded. Oh yes - I reported yesterday my brain loss when buying ribbon - I can report that at the Craft Shop in the Garden Centre near me they had the same ribbon - so I

just chatting

Hi everyone - just sitting here having a cup of tea, relaxing between the monthly lunch that I attend (which always falls on this Thursday) & going to the Mold February meeting this evening. Yesterday afternoon I popped along to Hobbycraft to pick up some ribbon, the oasis for the flowers & I was also hoping that in amongst their cake making supplies they sold the little jars of edible glue.  I nearly missed them - but yes they did have it. Once again - which is beginning to worry me - I didn't appear to take my brain with me - as when I found the ribbon I wanted & asked the lady where I got it cut she said she would do it for me.  I then proceeded to tell her how much I required from each of the rolls.  One was about.5" wide & the other was baby ribbon (you know that really narrow ribbon).  When I got home I found I had given her the info the wrong way round - so now I have  loads of the .5" one but not enough of the baby one.  So another visit needed

wedding diary - page 5

Image
Hi everyone I thought I would keep you up to date with what I have been up to today regarding the wedding preparations.  But first here are the bases of the roses that I made before Don't look much do they?  But hopefully they are the base of some lovely roses. After spending a little time designing how I wanted the wedding cake to look I thought I would put some flowers around the bottom of the cake near to the board. Some time back in last year I caught a programme on C&C on cake decoration & the lady was promoting some moulds & cutters for producing different flowers.  I didn't think too much about it at the time - I thought they were good - but that was it.  When I bought the cake tin from Home Sense in Broughton Park they had a couple of these cutter/moulds & I thought they might actually be useful. So I bought a couple. About a week ago I drew up the design I wanted for the cake as described above.  Low & behold this week those cutte